How to Create Product Videos That Actually Sell
Creating a product video that actually sells boils down to a three-part rhythm: smart planning, smooth production, and sharp post-production. It all kicks off with a solid plan that nails down your audience and your message before you even think about hitting the record button. This initial strategy is the bedrock of a video that not only gets views but also drives real results.
The goal is to scale without dubious shortcuts and without hurting your credibility.
Building Your Video Strategy Before You Press Record
The best product videos are won long before the camera starts rolling. I know it's tempting to just grab your gear and start shooting, but a well-thought-out pre-production strategy ensures every single second of your video serves a purpose. Think of it less like a set of rigid rules and more like building a reliable framework for a successful shoot.
This kind of strategic groundwork is precisely why video has become such a powerhouse in marketing. The numbers don't lie: a whopping 89% of businesses now use video as a marketing tool, with explainers leading the pack. This isn't just a trend; it's driven by tangible results. For instance, 64% of consumers are more likely to buy a product online after watching a video about it. You can explore more video marketing statistics from Wyzowl's latest report to see the full picture.
Define Your Core Objective and Audience
Before you get lost in shot lists or script ideas, stop and ask one fundamental question: What do I want this video to do? Your answer to this question will steer your entire creative direction. Are you trying to build brand awareness, drive sales for a new launch, or maybe just cut down on customer support questions by explaining a tricky feature?
Each of these goals demands a completely different creative touch:
- For Awareness: You'll want to lean into storytelling and brand values. The goal is an emotional connection that makes people want to share it.
- For Sales Conversion: Get straight to the point. Show the product solving a real problem, highlight its best features, and finish with a crystal-clear call-to-action (CTA).
- For Education: Your job is to be the helpful expert. Create a clear, step-by-step tutorial that builds customer confidence and shows them how to get the most value.
At the same time, you need an almost uncomfortably specific picture of who you're talking to. A video for a tech-savvy early adopter will look and sound completely different from one made for a budget-conscious parent. Get into their heads. What are their pain points? What do they already know about products like yours? What kind of language will make them feel like you get them?
A video designed for everyone will ultimately resonate with no one. The key is to speak directly to your ideal customer's needs, fears, and aspirations. This focused approach makes your message feel personal and infinitely more persuasive.
Before you move on, it's helpful to organize these core strategic thoughts. A simple table can ensure you've covered all the essential bases.
Key Pre-Production Planning Elements
| Element | Objective | Key Questions to Answer |
|---|---|---|
| Core Goal | Determine the video's primary purpose. | What single action do I want the viewer to take after watching? Is it to buy, learn, or share? |
| Target Audience | Identify the specific viewer you are trying to reach. | Who is my ideal customer? What are their biggest challenges and motivations? |
| Key Message | Define the one takeaway you want to communicate. | If the viewer only remembers one thing from this video, what should it be? |
| Tone & Style | Establish the video's mood and aesthetic. | Should the video feel professional and polished, or casual and authentic? Funny or serious? |
| Distribution | Plan where the video will live and be promoted. | Will this be for a social media ad, a website landing page, or an email campaign? |
With these elements defined, you have a solid foundation. Now you can move on to the creative part with confidence.
Crafting a Simple Script and Storyboard
Now that you know your why and your who, it’s time to map out the what. A script doesn't have to be a 100-page masterpiece; for most product videos, a simple outline is all you need to stay on track.
A great place to start is the classic three-act structure. It’s simple, effective, and has been used in storytelling for centuries.
- The Hook (Problem): You have about 3-5 seconds to grab someone's attention. Start with a relatable problem, a surprising statistic, or an intriguing question that makes them stop scrolling.
- The Solution (Product): Introduce your product as the hero. This is where you show it in action, solving that problem you just introduced. Focus on the benefits, not just the features.
- The Call-to-Action (Resolution): End with clear, direct instructions. Tell the viewer exactly what you want them to do next, whether that's "Shop Now," "Learn More," or "Sign Up for a Free Trial." Don't be shy about it.
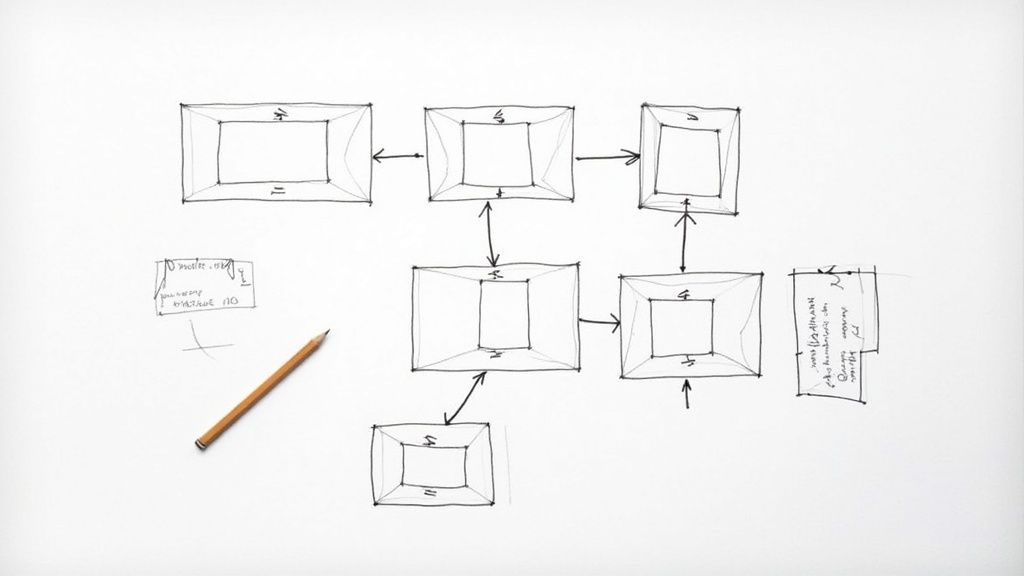
With a script outline in hand, the next step is a storyboard. This is your visual game plan, shot by shot. And no, you don't need to be an artist. Stick figures and messy sketches work just fine. The goal here is to visualize the flow, plan your camera angles, and make sure your words and visuals are telling the same story. A storyboard is your secret weapon for catching problems on paper, which saves a ton of time and headaches when you’re actually on set.
Choosing the Right Gear and Staging Your Scene
Let's get one thing straight: you do not need a Hollywood budget to create a product video that looks incredible. The biggest misconception I see is that expensive gear automatically equals a great video. It doesn't. A thoughtful setup with basic equipment will outperform a high-end camera used poorly every single time.
Believe it or not, the smartphone in your pocket is a powerhouse. Modern phone cameras capture stunning, high-resolution footage that can easily rival more expensive setups. Our goal here isn't to buy the priciest gear, but to eliminate distractions and make your product look its absolute best.
The Essential Production Toolkit
Before you even think about hitting record, a few small investments can make a world of difference. These items are all about tackling the two most common pitfalls of DIY video: shaky footage and terrible audio.
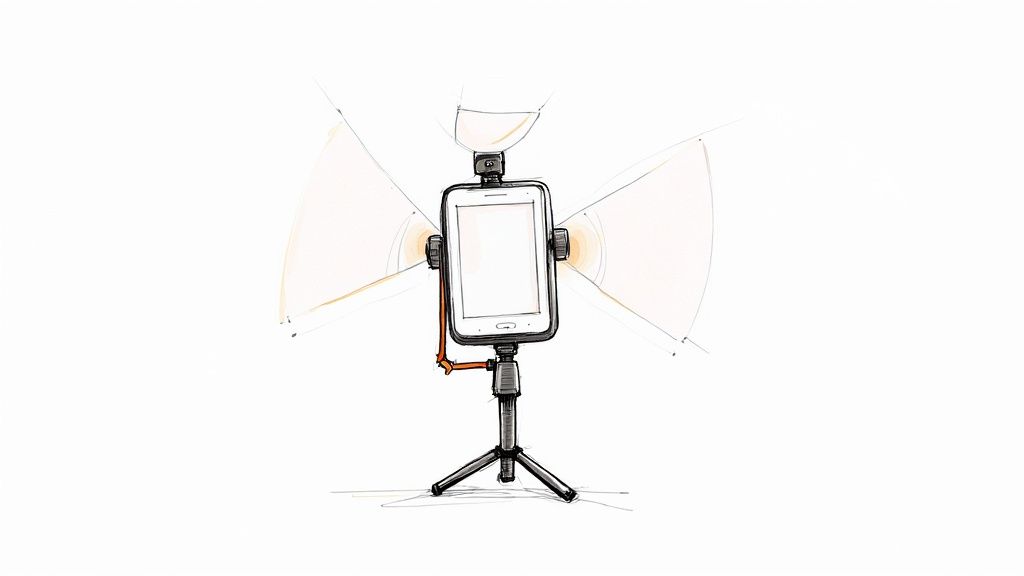
First up, stability. Nothing screams "amateur hour" louder than a wobbly camera. A simple, sturdy tripod is non-negotiable. It keeps your shots steady and lets the viewer focus on your product instead of feeling seasick.
Next, sound. People are surprisingly forgiving of slightly imperfect video, but they will bounce in a heartbeat if the audio is muffled, distant, or full of distracting noise. An external lavalier microphone—that tiny mic that clips onto your shirt—is a game-changer for getting crisp, clear audio.
Honestly, this is all you really need to get started:
- A Modern Smartphone: Any recent model will do the trick. Just remember to wipe the lens clean!
- A Sturdy Tripod: This is your best friend for getting those stable, professional-looking shots.
- An External Microphone: A lavalier mic is perfect for narration, ensuring your voice is front and center.
With just these three things, you've already solved over 80% of the technical problems that plague most beginner product videos.
Remember, the goal of your equipment is to become invisible. Great gear doesn't draw attention to itself; it simply allows the product to be the star of the show by providing a clear, stable, and easy-to-understand viewing experience.
Mastering Your Lighting and Backdrop
Once your gear is locked in, it's time to set the stage. Lighting is so much more than just making sure people can see your product. It’s about shaping how they perceive it. Good lighting can create mood, highlight beautiful textures, and make colors pop right off the screen.
You can get fantastic results with a classic three-point lighting setup. It’s the industry standard for a reason—it makes your subject look three-dimensional and appealing.
- Key Light: This is your main light source. It's the brightest and should be placed at about a 45-degree angle to your product.
- Fill Light: Positioned on the opposite side, this softer light "fills in" the dark shadows created by the key light.
- Backlight: This light sits behind and slightly above the product, separating it from the background and giving it a professional-looking outline.
Don't have studio lights? No problem. Use a bright window as your key light and a piece of white foam board to bounce that light back as your fill. Even a couple of desk lamps will work in a pinch.
Just as important is your backdrop. A cluttered background is the ultimate distraction, pulling focus away from the one thing that matters: your product. Go for simple and clean.
Here are a few easy backdrop ideas:
- A solid-colored wall in a neutral tone like white or gray.
- A roll of seamless paper from a camera store—it's affordable and looks great.
- A clean wooden table for a more rustic or natural vibe.
- A slightly blurred background (your phone's "portrait mode" is great for this) if you're shooting a lifestyle scene.
By taking control of your lighting and backdrop, you're taking control of the entire visual story. This is how you present your product in its best light and learn how to create product videos that truly connect with customers.
Capturing Footage That Tells Your Product's Story
Alright, your lights are set, your gear is ready—now for the fun part. This is where all that planning comes together and you actually start creating. The goal isn't just to point and shoot; it's to capture footage with intention, making sure every single clip helps build the story you mapped out.
A little pro tip I learned the hard way: always think like an editor when you're behind the camera. This is what we call “shooting for the edit.” It means you’re not just getting the main shots on your list. You're actively hunting for those extra angles, close-ups, and cutaways that will give you creative freedom when you sit down to piece it all together.
Mastering Essential Shot Types
Your shot list is basically your visual vocabulary. A video that looks and feels professional uses a smart mix of different shots to create a nice rhythm, draw attention to key details, and simply keep things interesting. You don't need a Hollywood-level crane to do this—just a few fundamental shots will make a world of difference.
Let's start with the basics you can't live without:
- The Wide Shot: This is your scene-setter. It shows the product in its environment and gives the viewer immediate context. Picture a new tent set up with a beautiful mountain vista behind it—that's a wide shot.
- The Medium Shot: Now we're getting a bit closer. This shot is perfect for showing the product in action without being so tight that you lose the context of how it's being used.
- The Close-Up Shot: This is your money shot. It’s where you zero in on what makes your product unique—the intricate design, the premium materials, or a specific button or feature doing its thing.
This image really drives home the difference between establishing the scene and zooming in on the details that matter most.
You need both. One gives context, and the other creates desire. It's a powerful one-two punch for visual storytelling.
Adding Dynamic Movement
Static, locked-off shots have their place, but a little intentional camera movement can add a layer of polish that makes your video feel incredibly professional. The trick is to keep it slow, smooth, and purposeful. Jittery, fast movements just scream "amateur."
A tripod with a fluid head is your best friend here, but even a steady hand can pull off a few simple moves.
- Pan: A slow horizontal sweep, left to right or right to left. A pan is fantastic for a dramatic reveal or to show off the full length of a product.
- Tilt: Just like a pan, but vertical. Tilting up can make a product feel heroic, while tilting down can reveal details piece by piece.
- Dolly/Slide: This is where you move the entire camera—forward, backward, or sideways. A slow push-in (dolly in) is a classic technique to build focus and draw the viewer's eye to a specific feature.
Here's the secret: great footage doesn't come from an expensive camera. It comes from capturing a variety of clean, stable, and well-composed shots. Your future self in the editing chair will be incredibly grateful for the options.
The Power of B-Roll Footage
B-roll is everything you shoot besides your main, scripted action (which is called the A-roll). It’s the secret sauce that makes a video feel rich and engaging, and it's your get-out-of-jail-free card in the edit. Seriously, when learning how to create product videos, getting good at B-roll is a total game-changer.
My rule is simple: you can never have enough B-roll. While your A-roll is the product itself, your B-roll library could include:
- Close-ups of hands interacting with the product.
- Lifestyle shots showing someone enjoying the product in a real-world setting.
- Artistic shots of textures, materials, or light glinting off a surface.
- Quick cuts of people smiling or reacting positively.
Having a treasure trove of B-roll makes editing a thousand times easier. It lets you cover up jump cuts, illustrate a point your narrator is making, and inject energy into your final video. Think of it as the visual glue that holds your entire story together.
Editing Your Video: From Raw Footage to Polished Story
This is where the real magic happens. After you’ve packed away the lights and cameras, you’re left with a collection of raw clips—your A-roll, B-roll, and audio recordings. Post-production is the art of weaving all those pieces together into a story that actually sells your product.
Think of yourself as a sculptor. You have the raw marble, and now it's time to chisel away the unnecessary bits, smooth the edges, and reveal the masterpiece inside. This stage is about more than just trimming clips; it’s about crafting the pace, dialing in the emotion with music, and making your message crystal clear.
Finding the Right Video Editing Software
Your first big decision is choosing your digital workshop. The editing software you pick can be anything from a free app on your phone to the same powerhouse suite used in Hollywood. Honestly, the "best" one is simply the one that fits your budget, skill level, and the complexity of your video.
If you’re just starting out, don't feel pressured to shell out for the most expensive option. There are some incredible free and low-cost tools that can produce seriously professional results.
- Great for Beginners: Tools like CapCut (which works on both desktop and mobile) and the free version of DaVinci Resolve are perfect starting points. They’re built with intuitive drag-and-drop timelines and have plenty of templates and simple effects to get you going.
- For When You're Ready to Level Up: Once you get the hang of things, you might look at subscription-based software like Adobe Premiere Pro or Final Cut Pro. These give you granular control over things like color grading and audio mixing, opening the door to truly cinematic work.
The goal is to pick a tool that feels empowering, not intimidating. It’s far better to master the fundamentals on a simple platform than to get lost in a complex one.
How AI Is Changing the Editing Game
Artificial intelligence isn't just a buzzword anymore—it's a practical tool that’s completely changing how we edit product videos. AI features are now baked into most modern editing software, automating the tedious stuff and unlocking creative potential that used to take days of manual work.
This isn't a slow shift; it's a rocket ship. AI adoption in video production has exploded from 18% in 2023 to 41% in 2024 as more businesses realize they can create better content, faster. This is a direct response to what customers want—a whopping 78% of people are asking for more video content from brands. You can dive deeper into these trends in this excellent video marketing report from Siege Media.
AI isn't here to replace your creativity. It’s here to amplify it. Think of it as a super-powered assistant that handles the grunt work, freeing you up to focus on what really matters: telling a great story.
To give you a clearer picture, let's look at some of the most common AI tools and what they can do for you.
AI Tool Comparison for Video Editing
| AI Feature | What It Does | Best For |
|---|---|---|
| Auto Subtitle/Captioning | Transcribes audio and generates synchronized subtitles in seconds. | Making videos accessible and engaging for viewers watching with the sound off. |
| Scene Detection & Selection | Analyzes footage and automatically identifies the best takes or trims out dead air. | Quickly sorting through long takes to find the most dynamic shots without manual scrubbing. |
| AI-Powered Color Correction | Automatically balances colors, contrast, and exposure for a consistent, professional look. | Achieving a polished, cinematic feel without deep knowledge of color grading theory. |
| Background Noise Removal | Identifies and removes unwanted sounds like hums, clicks, or background chatter. | Cleaning up audio that was recorded in less-than-ideal conditions (like an office or trade show). |
| Generative Fill / Object Removal | Removes unwanted objects or people from a shot by intelligently filling in the background. | Fixing an otherwise perfect take that has a distracting element you didn't notice during filming. |
These tools are game-changers, especially for small teams trying to produce high-quality content efficiently. They handle the technical heavy lifting so you can stay in the creative driver's seat.
Assembling Your Story and Adding the Final Polish
With your software fired up, it’s time to build your narrative. Start by laying your primary A-roll clips onto the timeline—this forms the backbone of your story. Then, sprinkle in your B-roll to add visual context and cover any jump cuts. For example, as you’re talking about a key feature, cut to a slick close-up of that feature in action. It keeps the viewer’s eyes engaged.
Next up: music. The right soundtrack is a shortcut to emotion. Find a royalty-free track that matches your brand’s personality—maybe something upbeat and poppy for a fun gadget, or something more ambient and sophisticated for a luxury item. Just make sure you adjust the volume so it complements the narration instead of competing with it.
Finally, add your text overlays and a powerful call-to-action (CTA). Use clean, bold text to highlight 2-3 key benefits as they’re mentioned. And always end with a clear, direct instruction. A simple graphic telling viewers to "Shop Now at YourWebsite.com" or "Download Our App" is the final nudge that turns a passive viewer into an active customer.
Getting Your Video in Front of the Right Eyeballs
So you've finished the edit. It’s tempting to hit export, upload it everywhere, and call it a day. But hold on—the race isn't over just because you crossed the creative finish line. A brilliant product video is worthless if the right people never see it.
This is where your focus has to shift from creation to distribution. It’s the part of the process that turns all that hard work into real business results, like more traffic, better conversions, and actual sales. This isn't about just uploading and hoping for the best; it’s a deliberate strategy.
And the data backs this up. A massive 93% of marketers see a positive ROI from their video efforts. Even more impressively, 84% say video has directly helped them increase sales. When you learn how to create product videos the right way, you’re not just making content; you’re building a sales machine. You can find more stats on video's impact that really drive the point home.
One Size Doesn't Fit All: Tailor Your Video for Each Platform
Here's one of the biggest rookie mistakes I see: posting the exact same video file across every single social media channel. A video that crushes it on YouTube will almost certainly flop as an Instagram Reel. Every platform has its own culture, its own technical specs, and its own audience expectations. You have to adapt.
This means you’ll need to create different cuts of your master video. Yes, it’s a little extra work, but the boost in performance is more than worth it.
- Website/Product Page (16:9 Landscape): This is your main event, the "hero" version. It should be high-resolution, detailed, and placed front and center to help customers click that "buy" button.
- YouTube (16:9 Landscape): This version is similar to your website cut, but you need to think about search. This means keyword-rich titles and comprehensive descriptions are non-negotiable.
- Instagram/TikTok (9:16 Vertical): Think fast. This cut has to grab someone's attention in the first two seconds. It needs to be punchy, visually dynamic, and have subtitles, since most people watch with the sound off.
- Facebook/LinkedIn (1:1 Square or 4:5 Vertical): These platforms are a bit more forgiving, but square or vertical videos take up more real estate on a phone screen, which is always a good thing.
Thinking about these different formats before you even open your editing software will save you a world of pain later.
Master the Art of Being Found: Video SEO and Thumbnails
On a platform like YouTube, your video’s success is all about discoverability. This is where video SEO comes in. You have to give the algorithm clues about what your video contains so it can show it to the right audience.
Start with some simple keyword research. What would someone actually type into the search bar to find a product like yours? Once you have a handful of terms, weave them into:
- Your Video Title: Don't just name it "AeroPress Demo." A title like "How to Use the AeroPress for a Perfect Brew Every Time" is far more effective and includes your keyword.
- Your Video Description: This is your chance to elaborate. Explain what’s in the video, add a direct link to your product, and sprinkle in some related keywords.
- Your Tags: Add relevant tags that cover the product category, your brand name, and the problem your product solves.
Your thumbnail is your video's billboard. It's often the single most important factor in whether someone clicks play or keeps scrolling.
Don't just let the platform pick a random frame. Create a custom thumbnail that is bright, clear, and teases the most valuable part of the video. A great thumbnail usually has a high-quality still image, bold and easy-to-read text, and maybe a human face showing a positive reaction.
Strategic Placement for Maximum Conversion
Finally, think beyond just posting on social media. Your product video is a powerful sales tool, and it should be everywhere your customers are.
Embedding the video directly on your product pages can give your conversion rates a serious lift. It answers questions and shows the product in action in a way static photos just can't. Place it right in your image gallery where no one can miss it.
Email is another goldmine. Including a video in an email can boost click-through rates dramatically. Use it in a welcome series for new subscribers, a launch campaign for a new product, or even in a post-purchase email to help customers get started. It’s all about delivering value at every single step of their journey with you.
Got Questions About Making Product Videos?
Even with the best roadmap, you’re bound to have questions when you start making product videos. That’s perfectly normal. Let's tackle some of the ones I hear most often so you have clear answers ready to go.
"How Long Should My Product Video Be?"
This is probably the number one question I get, and the honest answer is: it depends entirely on where you're posting it and what you want to achieve. There’s no magic number.
- Instagram Reels & TikTok: Keep it short and punchy. We're talking 15-30 seconds, max. Your only job here is to stop the scroll, deliver a single compelling point, and get out.
- YouTube & Website Product Pages: You’ve got more breathing room. Viewers on these platforms are actively looking for information, so a detailed demo running 2-5 minutes is perfectly fine. They want the details.
The golden rule is to respect the viewer's time. Say what you need to say to help them make a decision, and then wrap it up.
"How Can I Get Good Audio on a Budget?"
Listen up, because this is important: bad audio will ruin a good video, period. People will tolerate less-than-perfect visuals, but they will click away instantly if they can't hear you clearly. The good news is you don't need a fancy studio.
For less than $30, you can buy a simple lavalier (or "lav") mic that clips onto your shirt and plugs right into your smartphone. This one small purchase will make a massive difference by getting the microphone close to your mouth. Another pro tip? Record in a quiet room with soft surfaces—think carpets, curtains, or even a closet full of clothes—to absorb echo.
The real secret to great product videos isn't a Hollywood budget. It's fixing the two most common amateur mistakes: shaky footage and terrible audio. A cheap tripod and a basic external mic will instantly fix 80% of your technical problems.
"What Metrics Actually Tell Me if My Video Is Working?"
Making the video is just the start. You need to know if it’s actually doing its job. Forget getting hung up on raw view counts alone; those are just vanity metrics. You need to look deeper.
Focus on the numbers that tell you if people are truly engaged and if your video is helping your business:
- Watch Time & Audience Retention: This is your engagement goldmine. Where are people dropping off? If you see a huge dip at the 20-second mark, go back and re-watch that section. Is it boring? Confusing? Fix it in your next video.
- Click-Through Rate (CTR): This tells you how many people actually took action after watching. Did they click the "Shop Now" button or the link in your description? A strong CTR means your message was persuasive.
- Conversion Rate: This is the big one. How many viewers actually bought the product? Connecting video views to actual sales requires a bit of setup in your analytics, but it's the only way to prove your video is generating a real return on investment (ROI).
Ready to create stunning product videos, ad creatives, and marketing visuals without juggling dozens of expensive subscriptions? EcomEfficiency bundles over 50 premium AI and SEO tools like Midjourney, Runway, and Capcut into one affordable plan, cutting your software costs by up to 99%. Unlock your all-in-one creative toolkit today.